Since growing microgreens at home is incredibly simple and requires minimal supplies, they are gaining popularity in home gardens across India.
What Are Microgreens?

Microgreens are tender shoots of a vegetable or herb plant which are consumed at the cotyledon stage once the first true leaves appear. Most microgreens are grown upto a height of about 2 to 4 inches (5 cm to 10cm) Those unfamiliar with microgreens can mistake them for sprouts, but these are very different from sprouts due to their growing method. Microgreens will get ready to harvest 10 to 14 days after germination.
Microgreens are a great source of nutrients. They come in an array of colours. The flavour of microgreens is the same as that of any regular green but better.
Learn more about the differences between microgreens and sprouts in our detailed guide.
Types Of Microgreens
At AllThatGrows, we have over 40 varieties of microgreens chosen for their distinct flavours, aesthetic appeal and nutritional values. Let’s look at 8 easy to grow varieties for your home garden.
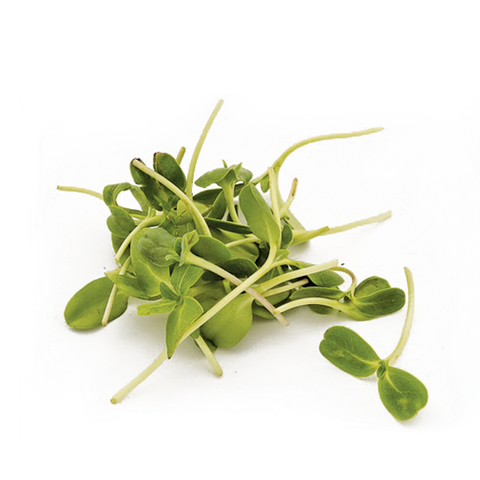
1. Sunflower Microgreens

Sunflower microgreens are known for their nutty flavour. They are easy to grow and harvested within two weeks. You can grow sunflower microgreen seeds without much effort in a small container like a used milk carton, salad boxes etc. Choose a seeding mix soil and keep it moist during the growth process. Sunflower microgreens require proper light and fresh air to grow as well. Hence, once germination starts, remove the lid.
-
Usage: Sunflower microgreens can be used in salads, soups, sandwiches, and dips for adding crunch. You can add them to your shakes and smoothies as well.
-
Benefits: A good source of calcium and iron. Vitamin A, B Vitamins, C, D, and E are available in plenty through these microgreens. They digest easily as well.
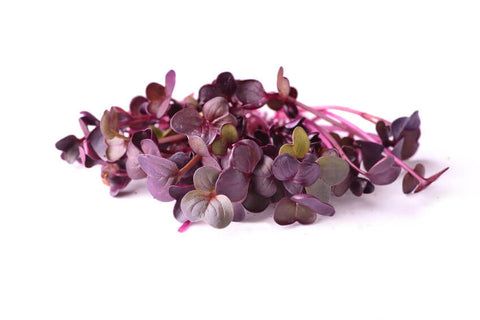
2. Radish Microgreens

Are you a newbie at growing microgreens? You can start your microgreen garden by growing radish microgreens. They are easy to grow, and they can be harvested as early as ten days after sowing. The radish microgreen seeds are very easy to grow. While planting, plant seeds evenly and densely on the soil surface.
Pro-tip: It’s a good idea to water the soil from below for most microgreens.
-
Usage: Provides flavour, crunchy texture and a touch of spiciness to food.
-
Benefits: Radish microgreens are rich in the mineral Manganese. And Vitamins like Vitamin B3 (Niacin), Vitamin B6, Vitamin C, and Folate.
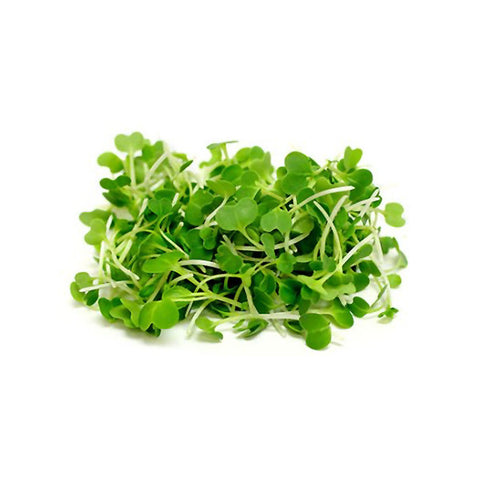
3. Pak Choi Microgreens

Pak Choi or Chinese cabbage is another microgreen variety that is popular amongst new gardeners. With perpetual planting, you can have a Pak Choi microgreen batch every ten days;. You can use soil or hydroponic mediums to grow them. The first three days of planting pak choi microgreen seeds need to be blacked out as they are sensitive to light. While harvesting, use a sharp knife directly at the stem.
-
Usage: It has a mild flavour that goes well with soups and salads
-
Benefits: Pak Choi Microgreens are full of Vitamins C, K, and E, beta-carotene, and iron. They can help prevent cancer cells from forming as it contains glucosinolate.
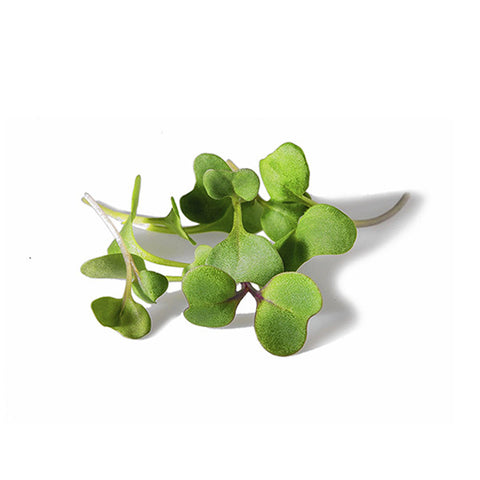
4. Broccoli Microgreens

Another popular and easy to grow microgreen - Broccoli. They can be harvested in just 6 to 10 days of planting. Their earthy and mild broccoli-like taste may surprise you. Broccoli microgreens seeds can be grown in shallow containers. They require light and moist soil to grow. Harvest the broccoli microgreens once they are 2 to 3 inches tall, by cutting them just above the soil surface. They are one of the healthiest microgreens.
-
Usage: Broccoli microgreens have an earthy flavour and a great addition to soups, sandwiches, etc. for extra crunch. .
-
Benefits: They are far more nutritious than the broccoli crowns that we usually eat. Like any other microgreens, they are rich in vitamins like Vitamins A and C as well as iron, calcium, and fibre to name a few. Broccoli microgreens have a protein content of 35%
Learn to grow broccoli microgreens at home.
5. Cabbage Microgreens

Did you know that you could grow cabbages as microgreens at home?. You can use any container that is about 2-3 inches deep. Spread out the seeds evenly and densely across the soil. Initially, for 2 to 3 days, the cabbage microgreen seeds require warm moist soil to germinate, and after germination, they require proper drainage and ventilation to grow. Cabbage microgreens are ready to harvest when they have open green leaves.
-
Usage: Cabbage microgreens can be used as a garnish for soups, salads, sandwiches, etc.
-
Benefits: They contain a high level of nutrients mainly, Vitamin C, Vitamin E and beta carotene. They also contain useful antioxidants.
6. Spinach Microgreens

Spinach microgreens are easy to grow with easy to find supplies that are available right at home.Pick a shallow container with 2-3 inches depth to grow these spinach microgreen seeds. After the blackout phase of 2-3 days after sowing, move the container to a sunny windowsill after germination. Regularly water them to help in growth, but ensure that the soil should not get soggy.
-
Usage: They are best used in salads, soups and sandwiches to add an extra flavour and crunch. It also adds colour when added as a garnish.
-
Benefits: Spinach microgreens are filled with nutrients like Vitamin A, Vitamin C, Vitamin K1, Folic Acid, Iron and Calcium. The microgreens are 4 to 40 times higher in nutrients than the mature plant.
7. Beetroot Microgreens

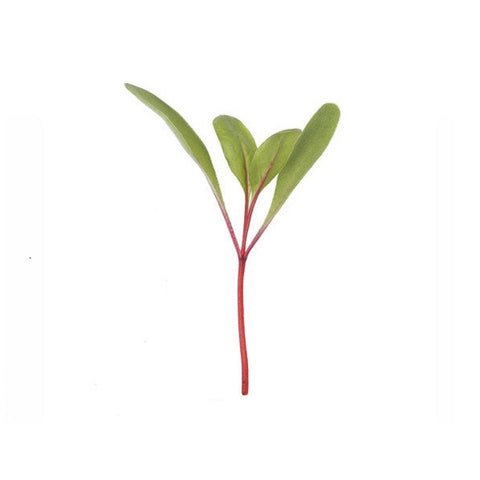
A colourful & nutritious addition to your microgreen garden are different varieties of beetroot microgreens. The beautiful pink, green and red hues of beetroot microgreens are quite popular with microgreen growers. Compared to other microgreens, they may take a few more days to harvest, but they are definitely worth it. Beetroot microgreen seeds do not like a lot of water in their roots to grow. Hence, make sure that your planting trays have proper drainage.
-
Usage: Beetroot microgreens provide a sweet and earthy flavour like their mature counterparts, hence they can be great accompaniments to soups, sandwiches, pasts, salads and so much more.
-
Benefits: Like any other microgreen, Beet microgreens have an abundance of Vitamins A, B, C, E, and K, iron, calcium, and protein. They also have a good supply of magnesium, potassium, and copper.
8. Corn Microgreens

Want to get the flavour of corn within a short period? You need to grow corn microgreens. They are easy to grow. When you start to plant them, the corn microgreen seeds need to be soaked for at least 8 hours. While harvesting, you need to cut at least ½ inch above the soil.
Corn microgreens have another secret up their sleeve. When grown in partial light, they tend to grow into beautiful golden yellow microgreens with a sweet taste. And while grown in full sun, they grow to have dark green leaves with slightly earthy and grassy flavours. You can take your pick as required.
-
Usage: These shoots have a distinctly sweet taste, just like the sweet corn we have. You can with any dish that requires a sweet punch.
-
Benefits: Consumption of Corn microgreens boosts the immune system, improves bone health, prevents anaemia, and helps reduce hypertension. They contain Vitamins A, B, C and E, Calcium, Magnesium and are a rich source of antioxidants.
Learn more about the best microgreens you can grow at home.
Are microgreens more nutritious than regular greens?

The name contains the word micro, but microgreens are full of nutrients. It has been seen that the nutrient levels in microgreens are 40 times higher than other regular greens. [ref]
This happens because the microgreens are harvested at the cotyledon or true leaf stage when they are packed with nutrition. . The flavour and texture of the microgreen shoots are also t much more intense than mature vegetables.
Health Benefits Of Microgreens

Besides being a popular garnish in different cuisines, tiny microgreens are also super healthy and must be consumed everyday with a healthy diet. Let’s look at some of their most evident health benefits.
- Microgreens are packed with nutrients including vitamin K & fibre, which helps manage high blood pressure and reduces the risk of heart attack.
- Consuming microgreens can also help reduce the inflammation in the body
- A healthy diet that includes microgreens has also been proven to reduce the risk of cancer. [ref]
- Since microgreens are easy to grow at home with minimal supplies, they can be a great source of daily nutritional requirements.
- Most microgreens are rich in beta-carotenes, which helps in preventing eye diseases and diabetes.
- As microgreens are consumed at the seedling stage, they can be grown all year-round for daily nutrition.
How To Grow Your Own Microgreens

Microgreens are very easy to grow in your home kitchen garden. Follow this easy step by step guide to grow your first batch of microgreens.
Step-1: Since microgreens are consumed at the shoots levels, it’s very important to use non-treated seeds. At AllThatGrows, we have over 40 varieties of microgreen seeds to choose from. Order your favorite varieties and start growing.
Step-2: Next step is to choose a container with a wide top. The container does not have to be too deep (2-4 inches depth works best), since we do not require the seedlings to establish their roots too deep. Fill it with some light potting soil and remember to not compress it too much. Also, make sure there is an outlet for water to drain.
Step-3: Prepare the soil by watering it 10-12 hours prior to planting. Sprinkle the seeds over the soil surface evenly and densely.
Step-4: Cover the sown seeds with a thin layer of the soil or cover with a lid and dark cloth for 2-3 days during the blackout period. Note: the blackout period is a way to induce germination.
Step-5: Monitor the growth of your microgreens. Water only if you feel the soil is dry. In case you need to water microgreens, water them from the sides of the container or use the method of bottom watering. Do not wet the leaves as it may lead to fungal diseases.
Step-6: Once the microgreen seeds have germinated expose them to direct sunlight.Remember to water them only if the soil feels dry on touch.
Step-7: Most microgreens will get ready to harvest in 7 to 10 days. Once they are 2-3 inches in length, snip them with a sharp knife or pair of gardening shears about ½ inches above the soil surface. Note that the roots of microgreens are not edible.
Step-8: Wash the harvested microgreens and use generously in your plates.
Final Words

Choosing a healthy lifestyle for yourself and your family may seem like a huge change, but microgreens are one great way to start . Start growing microgreens with our collection of easiest microgreens to grow in your kitchen garden or terrace garden in India all year-round. They all have a different time to harvest, but they are worth the wait.
These microgreens might be small in size but they are surely able to top the nutrients list when compared to their mature plant. Nonetheless, it is safe to say that microgreens should be added and introduced to our food culture.
One thing about microgreens, they should be eaten fresh. You can store microgreens but after harvesting, they start losing flavour and also the nutrients. To take the full benefit of microgreens, they need to be consumed within two days of harvesting. It is safe for adults as well as children. It is never too late to start growing your microgreens safely at home. Get quality non-treated microgreen seeds from AllThatGrows and start microgreens gardening today!


 Sign In





Let us know your feedback
* Comments must be approved before being displayed.