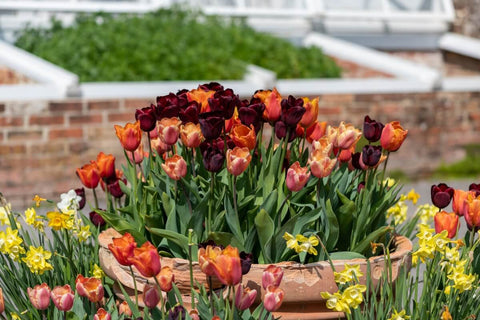
Ever since we’ve launched these bulbs for our community of home gardeners, one question that’s been consistent in our mailboxes is - How do we grow these in the pots and planters we already have. And that’s just what we are going to be covering in this guide. The charm of planting your own tulips, daffodils, hyacinths, gladiolus, crocus, and asiatic lilies in containers is undeniable. Let’s explore the benefits, essential tips, and a step-by-step process to help you cultivate a breathtaking container garden.
Benefits of Growing Bulbs in Pots:

The decision to plant bulbs in pots brings has a lot of benefits. Some of the common ones are:
- Versatility: Pots, especially fabric grow bags, offer flexibility, allowing you to move your garden and rearrange your blooms as you please.
- Space Optimization: Perfect for small spaces, pots make gardening possible on balconies, patios, and even windowsills.
- Easier Maintenance: Potted bulbs are easier to protect from pests and diseases, ensuring healthier and more manageable plants.
- Extended Blooming Season: With pots, you can control the environment, potentially extending the blooming season of your favorite flowers. Lean more aboutgrowing bulbs for spring blooming.
- Chance to Grow without a Garden: Wouldn’t that empty space in your balcony just look mesmerizing with some colourful tulips or fragrant hyacinths. And the best thing is, you need no garden to grow these bulb.
Important Tips for Growing Bulbs in Pots:

Choosing the Right Container:
Selecting the right container is crucial for the success of your bulb garden. Opt for containers with drainage holes to prevent waterlogging. Or consider fabric grow bags with breathable material to grow these bulbs. Consider the size based on the number of bulbs you plan to plant – giving each bulb enough space to grow and bloom.
Choosing the Right Potting Mix:
Use a well-draining potting mix that is specifically formulated for growing flowers. This ensures proper aeration and prevents soil compaction. If you think your soil is high in clay, mix in some organic compost to provide essential nutrients for your bulbs.
7 Simple Steps of Planting Bulbs in Pots:

- Preparing the Pots: Ensure the pots are clean and have drainage holes to prevent water stagnation. Place broken pieces of terracotta pots or stones at the bottom for additional drainage.
- Adding Potting Mix and Compost: Fill the pots with the chosen potting mix, leaving enough space for the bulbs. Mix in organic compost to enrich the soil with nutrients.
- Planting the Bulbs: Position the bulbs with the pointed end facing upwards. Plant bulbs at the recommended depth and spacing, typically two to three times their height. Space multiple bulbs evenly, allowing them room to grow and bloom without overcrowding. Learn more about the right plant to plant spacing for our most popular bulbs.
- Covering the Bulbs: Gently cover the bulbs with the potting mix, ensuring they are adequately surrounded but not buried too deep.
- Watering: Water the pots thoroughly after planting to settle the soil and hydrate the bulbs. Maintain consistent moisture levels, but avoid water logging.
- Mulching on Top: Apply a layer of mulch on top to retain moisture and regulate soil temperature. Dry leaves can be used as an easy DIY mulch in home gardens. Mulching also helps deter weeds and enhances the aesthetic appeal.
- Placing the Container in a Sunny Location: Position the pots in a location that receives adequate sunlight, usually 6-8 hours per day. Ensure proper air circulation to prevent fungal issues.
Tips For Creating A Layered Display With Bulbs In Pots:

For an enchanting and continuous display, consider planting bulbs in layers within the same container. Place larger bulbs at the bottom and cover them with soil. Add a layer of smaller bulbs, cover with soil, and repeat. This layering technique ensures a cascading bloom as each variety flowers at its designated depth.
Happy gardening!


 Sign In


Let us know your feedback
* Comments must be approved before being displayed.